We will now create a SQL DB to hold all of the historic IoT data.
-
In the Azure Portal, click + Create a resource in the top left. In the search box type SQB Database and select the SQL Database option by Microsoft that it finds. Once selected click Create.
-
Use the following settings for the SQL Database:
- Database name: Give your database a name
- Subscription: Select your Azure subscription
- Resource group: Select your existing IoT resource group
- Select source: Leave this at Blank database
Click Server and click Create a new server at the top. Use the following details for the server:
- Server name: Give your server a name
- Server admin login: Enter a username
- Password: Enter a password
- Confirm password: Confirm the above password
- Location: West Europe
Leave all other settings at default and click Select.
Then click Create. The SQL Database will now deploy, it will take a few minutes.
-
You will need to define the database schema to match up with the data coming in from the MXChip. Firstly, take a sample of the data coming from the sensor so you know what schema you need. To do this return to the Resource Group and click on the Stream Analytics job which you created earlier.
-
On the left navigation click Inputs then next to DeviceTelemetry click Sample data.

-
Click Sample to take a sample of the data being generated. Wait for a minute then click the bell icon in the top right corner of the portal. It should show that the sample input succeeded. Click on the message to open it.
Click Download at the top to download the sample data.
You can open the output in Visual Studio code to view it. You will see the format of the messages coming from the device and into the Stream Analytics job. This is the schema that needs to be replicated for the SQL database.
-
In order to create a new database for the message data, open Visual Studio 2017 (the full version, not VS Code). Ensure that you log into Visual Studio using the same account that you used to set up your Azure subscription.
-
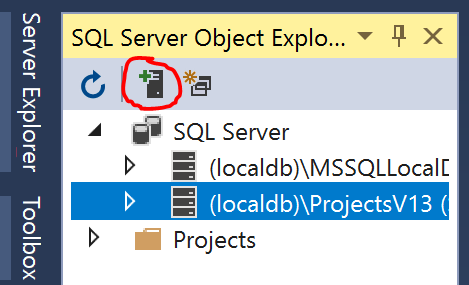
Click on the View menu, then click SQL Server Object Explorer. This will open SSOE on the left hand side. Click on the Add SQL Server button.
-
In the list of Connect options, choose Azure. This should expand your Azure subscription and show you the database you have just created. Click your database in the list and in the boxes beneath, enter the username and password you set up when you created the SQL database. Check the “Remember Password” box and click Connect.
You may get a message asking you to add a firewall rule to allow client access. Just click Ok, Visual Studio will do this for you automatically.

-
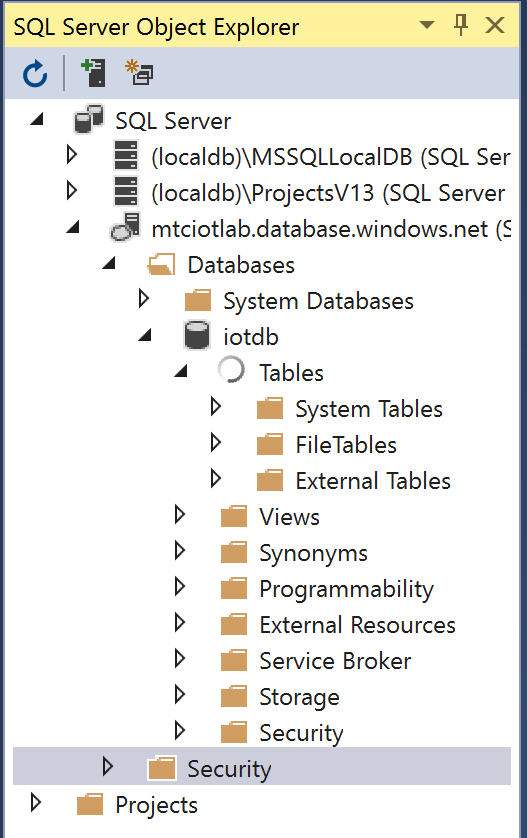
Your SQL server should now appear in the list. Expand the servers, then databases and click on the name of the database that you specified when you created your database.
-
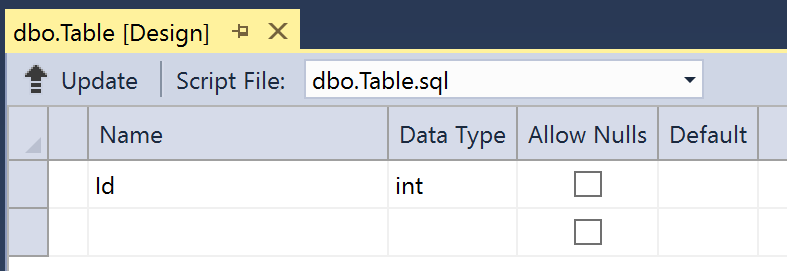
Right click on the Tables folder and click Add New Table. This will open the Table Designer screen which looks like this:
-
Follow these instructions exactly! You need to define your table schema in line with the data that is coming from the MXChip.
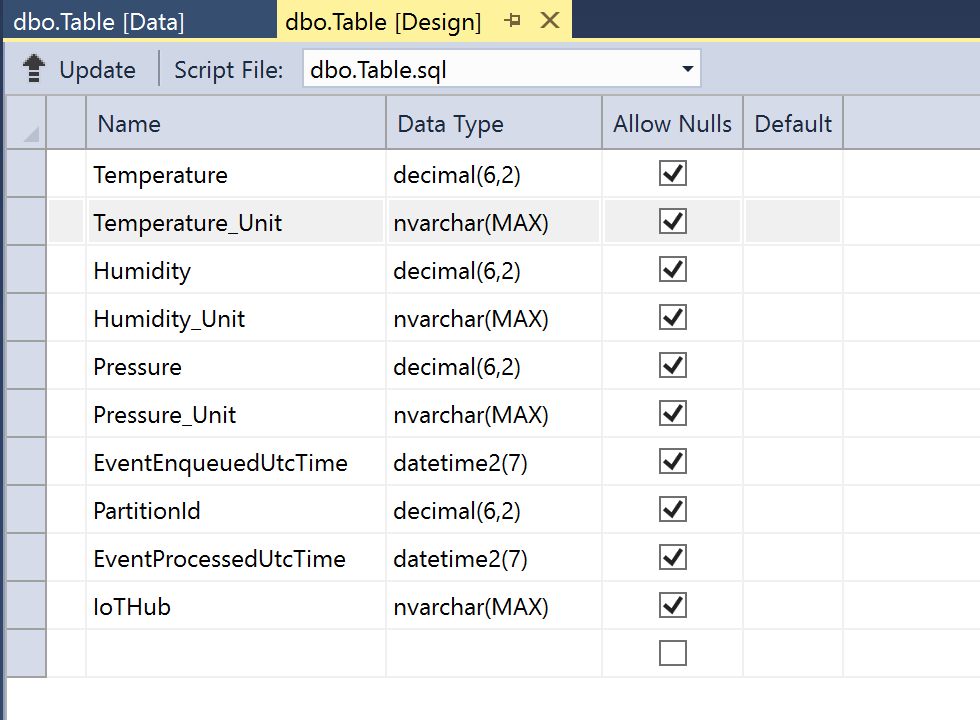
The first line will contain the field name id and will have a little key beside it. Click into the box and change the field name to Temperature. Change the Data Type in the drop-down to decimal(18,0) however change the numbers to (6,2). Continue down the list to create fields with exactly the names as follows:
 Temperature			    decimal(6,2)
 Temperature_Unit		nvarchar(MAX)
 Humidity			    decimal(6,2)
 Humidity_Unit			nvarchar(MAX)
 Pressure                decimal(6,2)
 Pressure_Unit			nvarchar(MAX)
 EventEnqueuedUtcTime	datetime2(7)
 PartitionId			    decimal(6,2)
 EventProcessedUtcTime	datetime2(7)
 IoTHub				    nvarchar(MAX)
When you change the value to decimal, the numbers in brackets will be (18,0). These numbers represent the length of the value before and after the decimal point. You change this number in the text window beneath the table, just here:
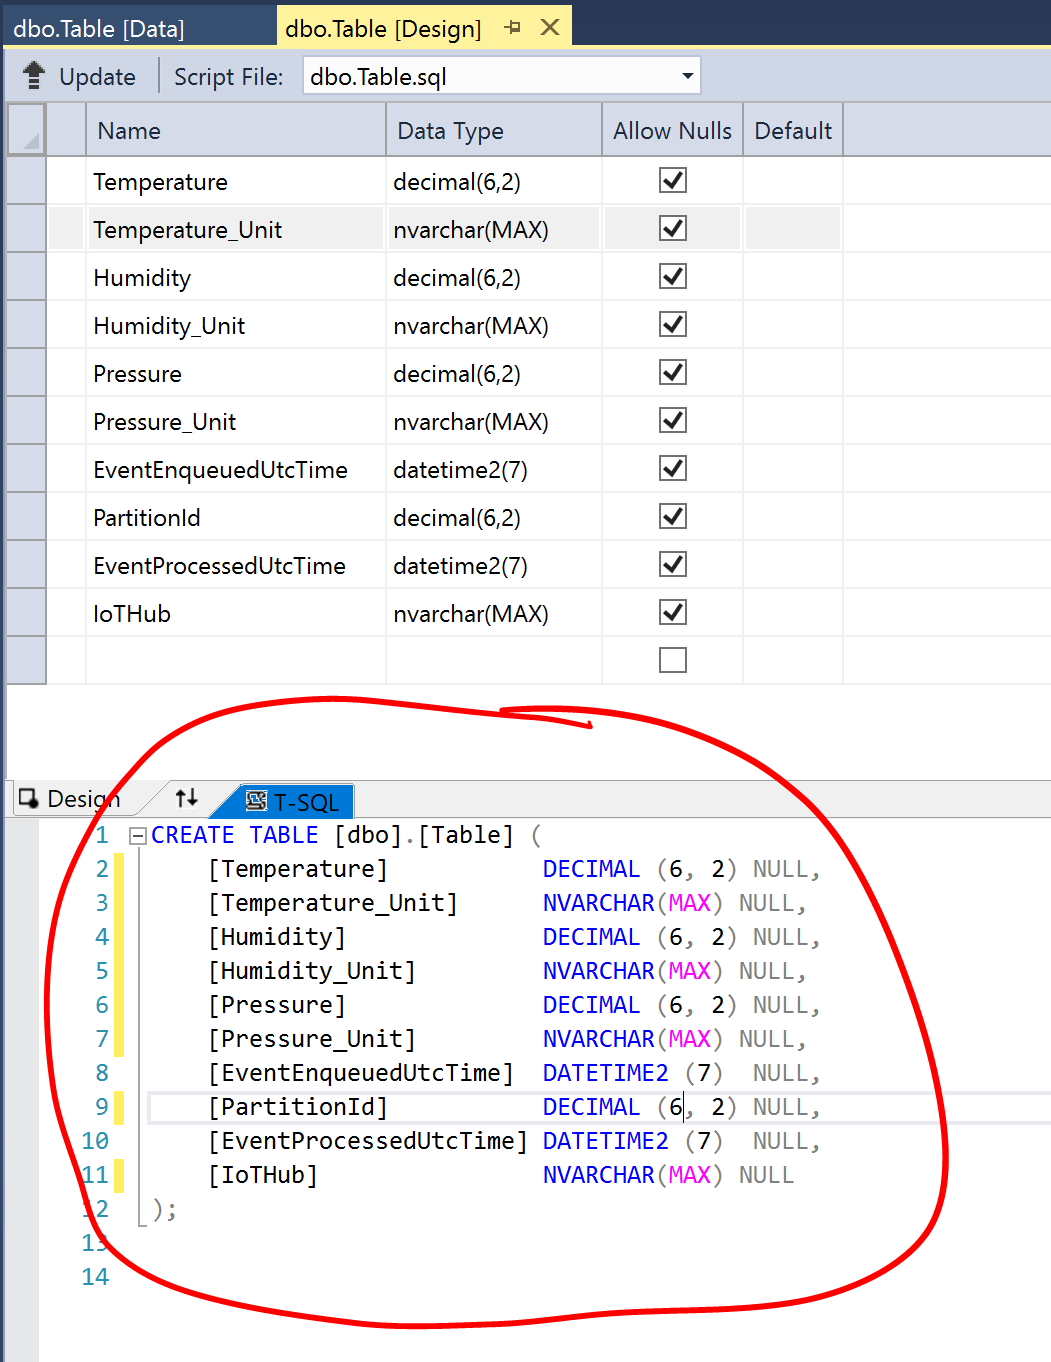
It will just say DECIMAL with no bracket. Add the (6,2) after the word DECIMAL in the T-SQL window and it will update the drop down in the table above.
When you have created all of your fields, right-click on the Temperature line and click Remove Primary Key. The little picture of the key should disappear.
When you’ve finished, your table design should look exactly as below:
-
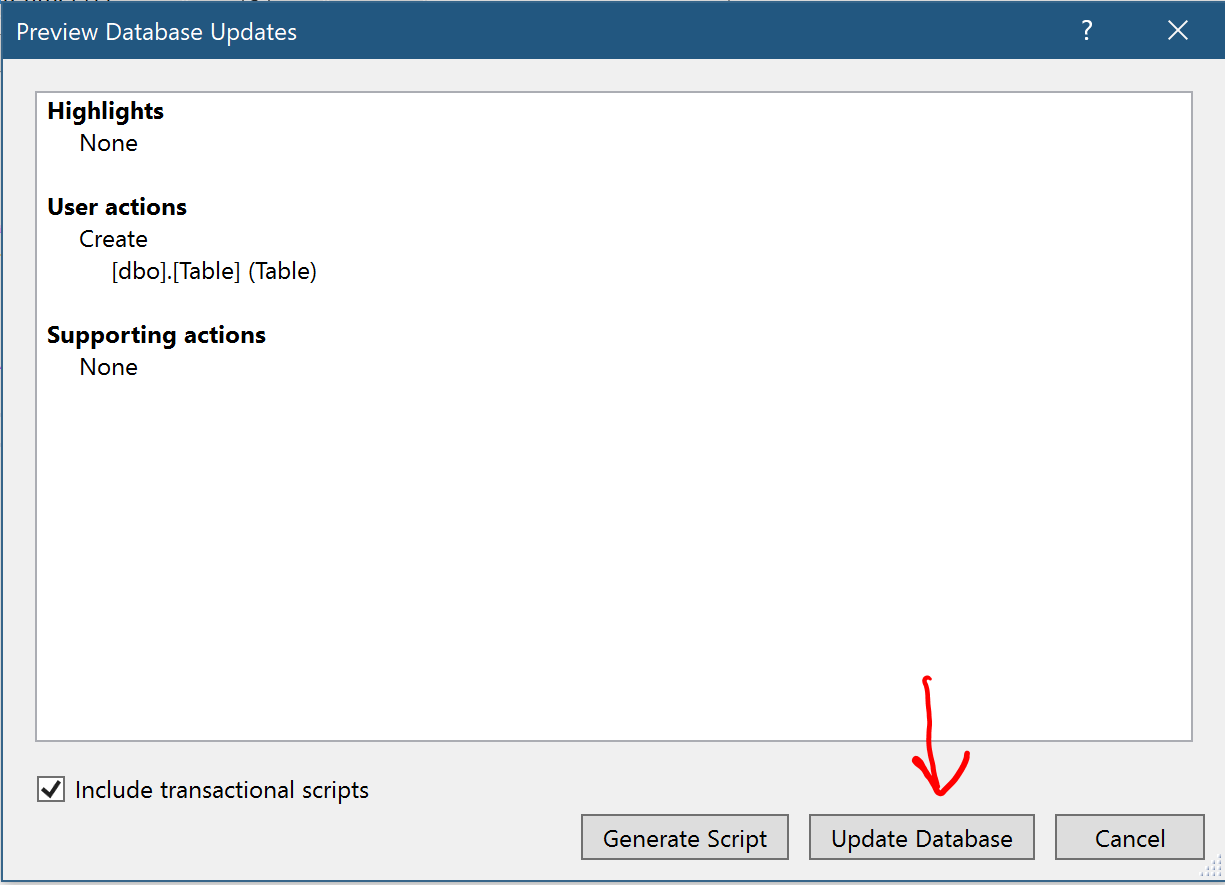
When you have completed your table design, click the Update button in the top left. This generates a script to configure your table. You will see the box below:
-
Click the Update Database button to commit your changes and create your table. The script will run and you should see a success message in the very bottom pane of the window once it has completed, this may take a few minutes.

-
Now you have created your database, you need to set it up as an output in Stream Analytics. Head back to the Azure portal and go to the Stream Analytics job you created. First, you need to stop the Stream Analytics job again. Wait for the job to stop, then click on Outputs on the left-hand blade.
-
Click + Add to add an output.
-
Pick SQL Database from the list. When the New output blade opens, Use the following settings. Call it Database.
- Outbase alias: Database
- Select SQL Database from your subscriptions
- Subscription: Your Azure Pass subscription
- Database: Pick your database from the drop-down menu.
- Username: Your database username
- Password: Your database password
- Table: dbo.Table
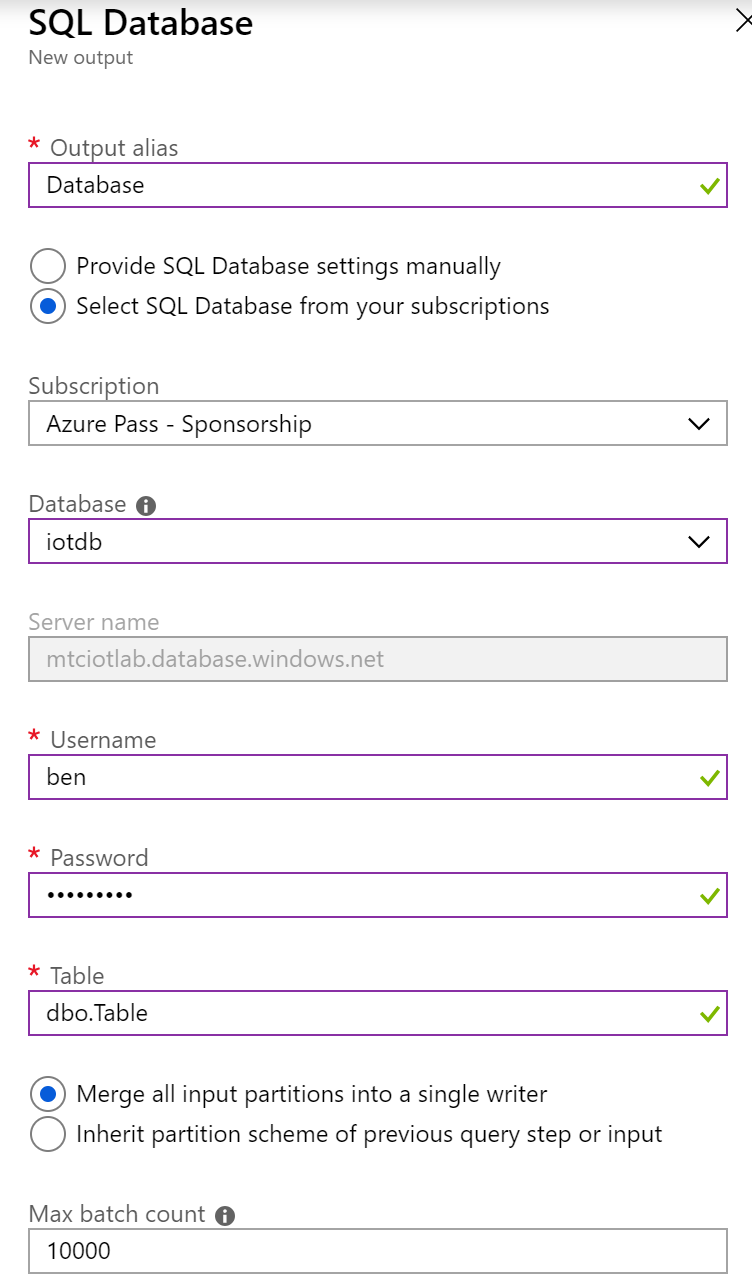
Leave everything else at default and click Save. It will now create and test the output.
-
Return to the Stream Analytics overview and click Query in the left-hand blade to amend your query again. Add the following lines after the existing query exactly as they appear below.
 SELECT
     *
 INTO
     [Database]
 FROM
     [DeviceTelemetry]
 WHERE
     IoTHub.ConnectionDeviceId = 'AZ3166'
Your query should now have two new sections and look like this:

-
Click Save to update your query, then click Overview. Click Start to start your stream Analytics jobs again. This will take a few minutes.
-
When the Stream Analytics job is showing as Running, we can check that data is reaching your SQL database. Return to Visual Studio 2017, You should see your new table listed on the left hand side under your Azure SQL Database, dbo.table. You may need to refresh the view at the top.
-
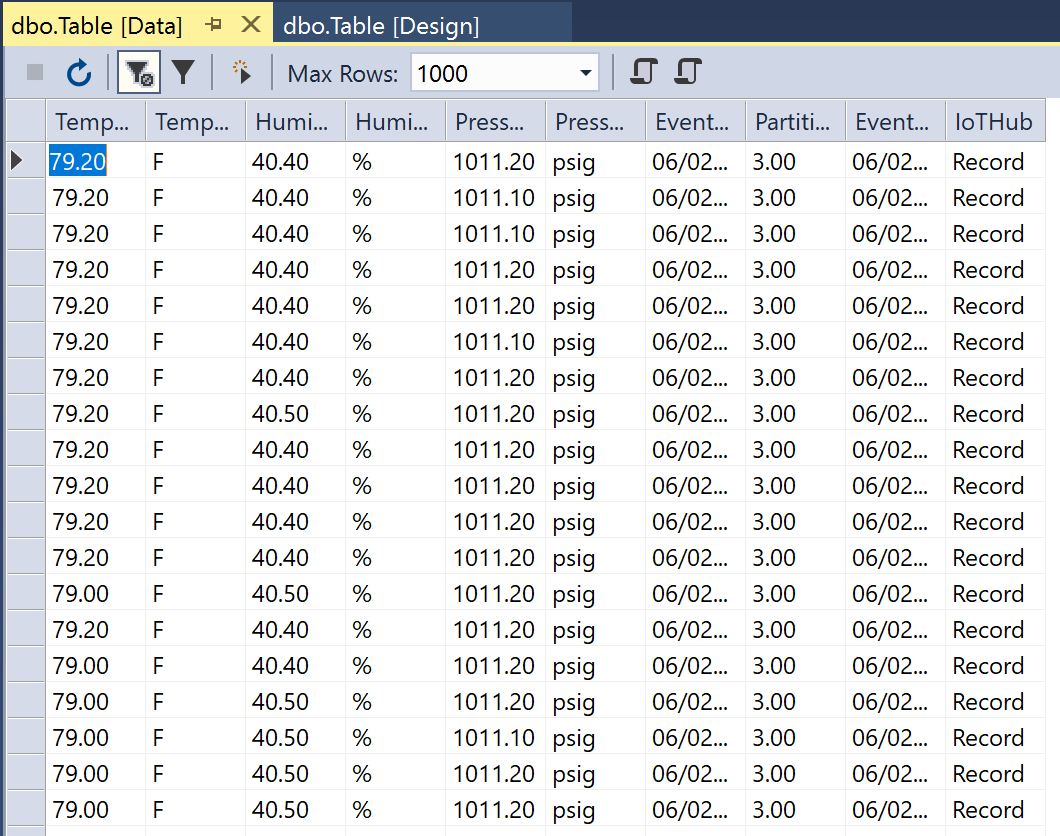
Right-click on your table and click View Data. This will open your table in Data view. You see some rows populated with data. If not, click the Refresh button a couple of times, it can take a few minutes for sensor data to reach the table.
This is how your table should look:
Now we have the data moving through Azure. We can now setup the Power BI dashboard.